What to Do When Your Car Interior Gets Mouldy: A Step-by-Step Guide
As we are coming into the colder winter months there is a danger of mould growth in some little used cars. Discovering mould in your car can be a disheartening experience. Not only is it unsightly, but it can also pose health risks and lead to significant damage if left untreated. If you’ve found yourself in this situation, don’t panic! This comprehensive guide will walk you through the necessary steps to effectively tackle mould in your car’s interior and prevent it from returning.
Understanding the Causes of Mould
Before you can address mould growth, it’s crucial to understand its underlying causes. Mould thrives in damp or humid environments, making your car an ideal breeding ground under certain conditions. Here are the primary culprits:
- Moisture: Leaks from windows, sunroofs, or the air conditioning system can create moisture build-up in your vehicle.
- Humidity: If you live in a humid climate or frequently park your car outside, the increased humidity can foster mould growth.
- Food and Debris: Crumbs, spills, and organic materials left in your car can provide a food source for mould spores, facilitating their spread. Even a leaking water bottle in an otherwise dry car can cause mould.
By identifying these factors, you can better prevent mould from developing in the first place.
Step 1: Assess the Damage
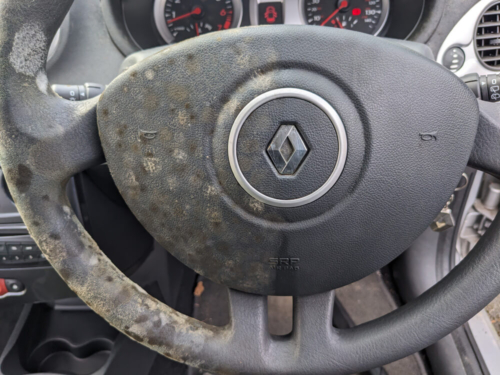
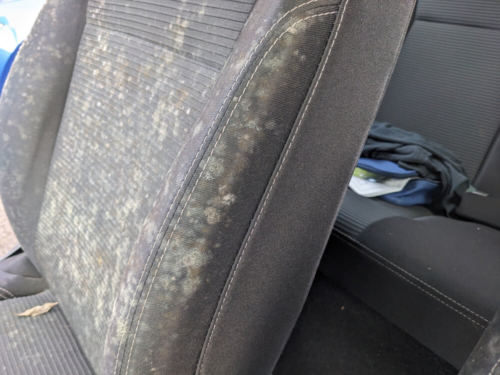
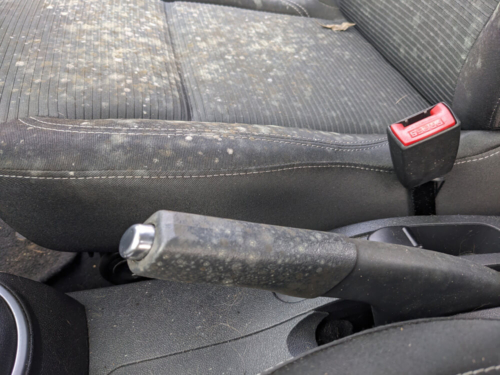
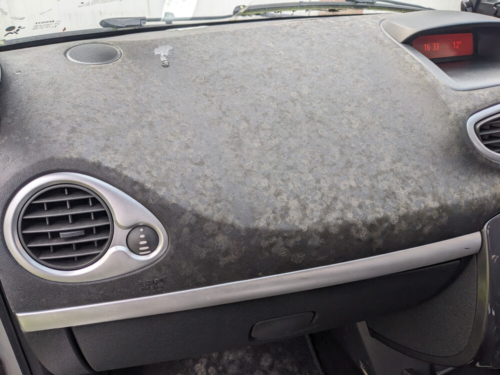
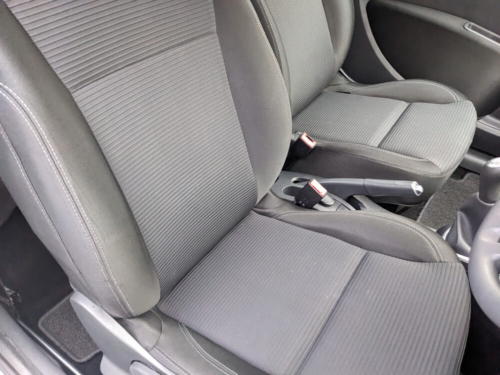
The first step in addressing mould is to assess the extent of the damage. Inspect your car’s interior thoroughly, focusing on:
- Upholstery: Check the seats and fabric coverings.
- Carpets: Look for discolouration or fuzzy spots.
- Crevices and Storage Areas: Mould often hides in less visible places like pockets or in cup holders.
- Check under carpet mats: Lift each mat and feel for dampness in the carpets, also check under the boot carpet.
If the mould is isolated to a small area, you might be able to clean it yourself. However, extensive mould growth may require professional attention.

Step 2: Remove the Source of Moisture
If you have discovered a leak it’s useful to eliminate any sources of moisture before cleaning although if the mould problem has taken hold most garages will refuse to work on the car before it has been cleaned. Check for:
- Leaks: Inspect seals around windows and doors, as well as hoses in the air conditioning system. Repair any leaks to prevent future moisture buildup.
- Check the drain tubes: Cars with sunroofs will have a drain tube in the sunroof surround which can get blocked
- Damp Items: Remove wet items like umbrellas, water bottles, food or towels from the car.
You can also use a dehumidifier or leave the windows slightly open (if weather permits) to promote airflow and reduce humidity levels inside the car.
Step 3: Clean with Mould Remover
We would recommend using a professional for this as ideally the interior fabrics of the car would need to ne shampooed in order to remove the mound spores. However if the problem is not too severe you may chose to clean it yourself.
Using a vacuum cleaner with a HEPA filter, thoroughly vacuum all affected areas. This step is crucial as it removes not only mould spores but also any debris that may contribute to further mould growth.
Once you’ve vacuumed, it’s time to tackle the mould itself. Apply your chosen mould remover directly to the affected areas. Follow these steps:
- Spray Generously: Ensure the mould is well-saturated.
- Let it Sit: Allow the solution to penetrate for about 10-15 minutes.
- Scrub Gently: Use a soft brush or cloth to scrub the area. Be cautious not to damage upholstery or surfaces.
- Rinse: Use a clean rag soaked in warm water to wipe away the solution.
For stubborn mould patches, you may need to repeat this process several times. Always rinse your brush or cloth frequently to prevent spreading spores.

Step 4: Dry the Interior
This is the most important stage to ensure the mould does not return. Thorough drying is crucial to prevent mould from returning. Cleaning will introduce more moisture into the car interior and if this is not dried out the mould will return fairly quickly Here’s how to ensure your car dries effectively:
- Air Circulation: Open windows a small amount to allow fresh air to circulate.
- Use the car: useing the car regularly will help to keep fresh air in the car and the cars heater will help to dry the moisture
- Sunlight: If possible, park your car in a sunny spot; UV rays can help kill mould spores
- Use Fans: Positioning fans inside the car can speed up the drying process.
- Use cat litter: Cat litter can absorb moisture from the air in the car.
If you have a dehumidifier, placing it in the car can also help draw out excess moisture.
Step 5: Prevent Future Mould Growth
Once you’ve successfully cleaned your car if you are not going to use it regularly take steps to prevent mould from returning:
- Ensure good ventilation: leave a window slightly open on each side of the car to allow fresh air to flow through the interior (the benefit if this far outweighs a few drops of rain getting in)
- Moisture Absorbers: Consider using cat litter, silica gel packets or activated charcoal bags, which can help absorb moisture.
- Check for Leaks: Regularly inspect your car for any signs of leaks or water intrusion.
- Climate Control: If you live in a humid area, consider parking in a garage or using a car cover to reduce exposure to moisture.
Conclusion
Mould in your car can be a nuisance, but with prompt action and the right cleaning techniques, you can restore your vehicle’s interior to a clean and healthy state. Regular maintenance and awareness of your car’s environment will help prevent mould from becoming a recurring issue. By following these steps, you can enjoy a fresh, mould-free ride for years to come. Happy driving!